


Radiant Barriers

Introduction To Radiant Barriers
Installed in homes, radiant barriers are used to reduce the heat gain caused by the sun bearing down on the home. Primarily used in attic spaces, radiant barriers help to reduce the home's cooling costs by keeping attic temperatures lower.
Radiant barriers should always be used in conjunction with traditional insulation materials, as they do not reduce the conduction of heat like insulation. Working together, radiant barriers and thermal insulation products can go a long way to reducing a home's energy usage.
How Radiant Barriers Work
It's time for a (very) brief physics lesson. Heat is transferred three different ways: convection, conduction, and radiation.
Convection: Heat is transferred when a gas or liquid is heated , becomes less dense, and rises. When the gas or liquid is cooled, the opposite occurs.
Conduction: Heat passes from a warmer location to a cooler one. A cool spatula left in a pot of boiling soup will itself become hot.
Radiation: Heat moves in a straight line away from a heated surface, where it is absorbed by anything that is around to absorb its energy. When a sunbather gets hot laying under the bright summer sun, that's radiant heat. And radiant heat is where radiant barriers come in.
Blocking the Suns' Radiation
Where traditional insulation materials work by slowing or blocking conductive and convective heat flow, a radiant barrier works to reduce the radiant heat that comes from the sun.
A radiant barrier contains a highly-reflective surface designed to keep this radiant heat from overheating an attic space, where temperatures on summer days can easily reach 160 degrees or higher.
When the sun beats down on a roof, most of that heat is of the radiant variety. The roofs' surface becomes hot, and that heat radiates through to the cooler attic space surfaces below. As we defined above, that radiant energy is absorbed by all surfaces in the attic, making them hot.
The radiant barrier, installed properly, reduces this radiant energy back to the roof, where it typically only raises roof surface temps by 2 to 6 degrees, not enough to do any damage to the roof structure.
Radiant barriers can lower attic temperatures by as much as 30 degrees, making the living space below the attic cooler, and lowering the demand on the air conditioner. During times of high temperatures, radiant barriers can reduce energy costs by up to 10%.
Types of Radiant Barrier

Radiant Foil - Attic Installation
Radiant barriers are usually some type of highly-reflective material such as aluminum foil, adhered to a substrate material like paper or plastic film. The barrier comes in various forms, with the most popular product being a roll of foil that is applied to the underside of the attic roof. A radiant barrier can be added during construction, or easily added to an existing home.
Proper Installation of Radiant Barriers
Like all other types of insulation, radiant barriers must be installed properly in order to achieve their maximum performance level.
Radiant barriers are most effective when installed perpendicular to the angle of the radiant energy that is striking it. In most home roof scenarios, this is not an issue as the roof is already angled at a perpendicular angle to the suns' rays.
It's also important that the reflective radiant barrier material stay shiny and reflective in order to work. Dust, dirt, and other contaminants that settle on the barrier will reduce its effectiveness. Some installers advocate simply laying radiant barriers overtop of an attics' thermal insulation, but this will lead to dust accumulation and reduced performance overtime. Laying radiant barrier material directly on top of insulation also moisture buildup which can lead to problematic mold and fungus growth. Again, applying the radiant barrier to the roof itself is the optimal location.
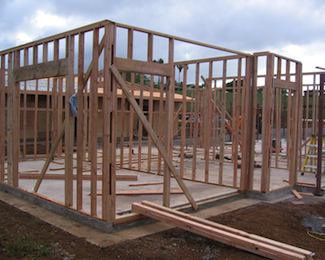
For new home construction , radiant barrier material can be applied to the roof before roof sheathing is added. For existing homes, the radiant barrier is applied to the underside of the roof by stapling it to the bottom of the rafters. *Important Tip* There must be an air gap between the radiant barrier and the roof surface for the barrier to work effectively. Make sure there is at least 1 inch between the radiant barrier material and the roofs' surface. If it's stapled to the roof rafters, this is usually not a problem.
Radiant barriers will achieve the fastest, quickest reduction in energy costs in areas that experience regular high temperatures and lots of sunshine. For cool areas, they will still work but will take longer to recoup their costs in energy savings. Homes in cooler climates may see better results by adding more thermal insulation (blown-in, batt-type, spray foam, etc.) before installing radiant barriers.
Radiant Barrier Installation Tips
Adding a radiant barrier to an attic roof is a great do-it-yourself project, but there are some tips to remember. First, an attic environment can get hot very quickly during a summer day. Wait for a cool day to install barriers or you could easily and quickly overheat, which is a serious health risk. Also, it's going to be dark and very dusty. Make sure you have the proper safety equipment: goggles and a filter mask are musts. Insulated attics have lots of fiberglass or other insulating material dust flaoting around that you don't want to breathe in or get in your eyes.
Make sure you are watching where you walk in the attic. Stand only on the frame of the roof, not the drywall in between; it's not designed to hold your weight, and standing on it could easily result in falling through the roof, and serious injury. A 4 x 4 or other sized piece of plywood makes a great working platform. Recruiting a second volunteer will also make the job much easier.
Some notes on the actual placement of radiant barrier materials: Don't ever block any vents or fans in attic roofs or gable walls. The attic needs these to ventilate the air, and blocking them will defeat any benefits the radiant barriers give. Also, make sure you leave gaps at the top and bottom of the attic roof (about 3.5 inches on the bottom and 6 inches at the top). This allows heat coming through the roof to pass up the roof (under the radiant barrier) to the top of the roof where it can escape.
Follow all instructions that come with the radiant barrier closely to ensure both your safety as well as proper installation of the materials.
Finally, it must be stated that radiant barriers should never be used INSTEAD of traditional thermal insulation! The two work to block or slow completely different types of heat. Some homeowners add more insulation at the same time as adding radiant barriers for maximum energy savings.
Several hours of work on your part can easily result in years of energy savings for your home.
comments powered by Disqus